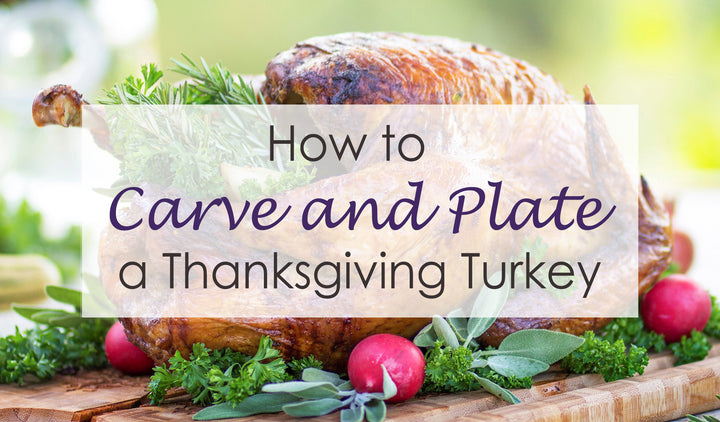
Posted on November 04 2022
Happy fall everyone! We hope you are enjoying the cool temperatures, pumpkins, apple cider, and most importantly, the incredible food. Today, we will guide you on how to perfect your Thanksgiving plate by nailing the star of the meal: the turkey. Whether you’re new to cooking or are looking for helpful tips on turkey plating and carving, you’ve come to the right place!
Turkey Prep
First, let’s talk about supplies. You’ll only need a couple of things to make your best Thanksgiving plate to date. We want this process to be as effortless as possible, and not feel like it takes 10 years of blood, sweat and tears to finish it. Holidays can be chaotic for many of us when preparing large amounts of food for family and friends, but have no fear! With these instructions and tips, there will be more room for laughter and less room for stress this holiday season.
Supplies List
- Sharp Knife: While a turkey carver will definitely do the job, it isn’t necessary! As long as you have a sharp carving or chef’s knife, your turkey will still turn out amazing.
- Carving & Serving Board: We highly recommend our Family Tree Carving Board! This board is perfect for all your carving, cutting, and serving needs. Beautiful and functional, the board has a stunning family tree engraving on the front with deep juice grooves in the tree trunk, branches and perimeter of the board.
- Towel or Gloves
- Extra Container: Toss any part of the turkey you don’t eat in a bowl to use for stock later.
- Garnish: Array of herbs and filler ingredients to put the finishing touches on your turkey.

Before you begin the turkey carving process, it is crucial that the turkey rests for at least 30 minutes. Giving it this time allows the juices and flavors to absorb into the meat, instead of them dripping all over your counter. Besides, any excess juices will be caught in the juice grooves of your Family Tree Carving Board for easy and mess-free cleanup!
Turkey Carving
Time to set up your carving station! Have your knife and towels nearby while you remove the trussing string from the turkey. The most efficient carving order starts by removing the thighs, then the breasts and finally, the wings.
Hot tip: Remove the wings last because they will help stabilize the turkey as you carve it.
1. Remove the Legs from the Body
Slice your knife along the natural separation line between the body and thigh, down to the joint of the thigh. Gently pull the leg apart from the breast until you see or hear the joint pop. With a towel or gloves, push up underneath the thigh until the joint is clearly visible, then cut around the joint to entirely separate the leg from the breast. Complete this step on the other leg and set them aside.
2. Carve Out the Breast
Run your knife down the middle of the top keel bone, gently separating the breast meat from the body with your thumb. Once your knife hits the ribcage, slightly angle it away from the middle and continue slicing down. Run your knife along the breastbone until it reaches the joint between the wing and the breast. Now, replicate the same action you used for detaching the legs and cut the breast off from the body. Repeat on the other side and set them aside.
3. Cut Off the Wings
At this point, you should have the inside structure of the turkey and the wings left. To remove the wing, pull back on it and you should see the joint popping out. Simply cut by the joint where the wing naturally separates from the body. Repeat on the other side. A lot of people love the taste of turkey wings, but it’s also one of the best parts of the bird to use in stocks to make delicious fall soups and stews!
Turkey Plating
Plating can be done in a number of different ways. Some people like to place the entire turkey on the dinner table for everyone to dig in and some enjoy cutting it into slices for easy plating. This step is totally up to you!
Hot tip: Even though your oven will be off, it’s always a good idea to pop the turkey you aren’t cutting at the time in it while it’s still a little warm. This will ensure that the turkey doesn’t get cold while you cut the rest– nobody wants cold turkey on Thanksgiving!

1. Legs
Start with the legs. Flip the leg over so the skin is facing down on your carving board. Flipping the leg allows you to see the natural line of joint separation between the thigh and the drumstick. Once you have separated the drumsticks from the thigh, set them on your serving board of choice– they’re ready to go! Next, you will want to de-bone the thigh. Run your knife on either side of the bone until it comes out. Once you have removed the bone, cut the meat into slices, preferably at an angle to maintain as much skin as possible in each bite.
Hot tip: Don’t forget that any bones or carcass of the turkey can be used for stock, so don’t throw out any parts! This is where your extra container comes in handy.
2. Breasts
Make sure you slice against the grain of the meat. This will make your meat much more tender and delicious! Cut slices along the breast with a slightly angled knife, again, trying to keep as much of the skin as possible.
3. Wings
No cutting is necessary for the wings. Simply place them on your board because they are ready as is!
Garnishing
Garnishing your turkey is all about personal preference. Adding herbs and other fillers for the final presentation turns your turkey from a 10/10 to a 15/10. Sprinkle a variety of herbs such as rosemary, thyme, parsley and chives on top, or place larger bundles in the open space between the pieces of turkey. If you chose to slice your turkey, lay down the slices so they lean onto each other instead of stacking them. This creates an effortless look that is sure to wow your guests!

Now, all that’s left is to devour your delicious Thanksgiving plate. We hope you have successfully carved and plated your turkey with ease. Make sure to leave us a comment and a picture of your final presentation– we would love to see it! Happy Holidays!
0 comments